
How to Make a Go Kart | Build Your Own Go Kart
A go-kart is more than just a toy. A go-kart is a tradition to many people. Many people remember building go-karts in their garages with their fathers when they were small. These memories will last forever and they want to build memories like that with their own children. If you want to build your own go kart I salute you. Let’s read my guide to How to Make a Go Kart.
I suggest that you look at our article covering my top 20 picks for ready-made go-karts and see some of the possible features, and design ideas that you might like to include in your personal machine.
Detailed Guide to How to Make a Go Kart
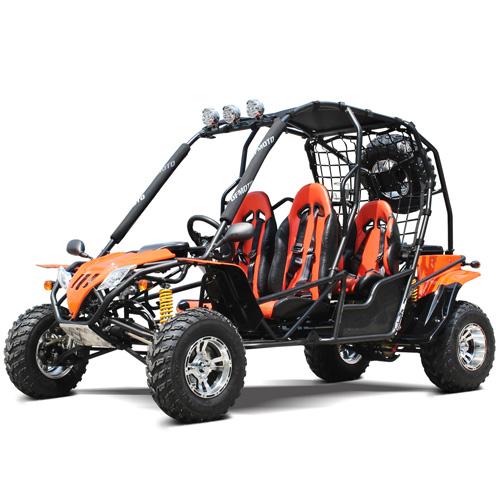
image from: wholesaleatv.com
The following plans for a go-kart are meant to inspire you and help you determine what items you will need to create the best go kart possible. Good luck with your project, and I hope you have a lot of fun.
What’s The Cost to Build a Go Kart
When your building your go-kart it will depend on what type of vehicle you’re planning to build (wooden go-kart, electric go-kart or a go-kart racer). The bulk of the budget will be spent on the engine, the go-kart frame parts, and the tools in putting up everything together (nuts, bolts, cables, welding materials). This kind of DIY project will require more work than cost because it can be challenging to design and fabricate your assembly and the kart’s drivetrain. Depending on the project type the cost of building your go-kart estimated price build can go at reasonable price.
Make A Frame
The backbone of your go kart is the frame you design. You can make your go-kart frame in any size or shape that you desire. This is your go-kart, but there are a few things you should know about go -kart frames before you finalize your design style. The easiest way to determine the exact dimensions that you want your final product to be is for you to sit on the concrete floor and imagine that you are in the go-kart.
Consider the leg room, and whether the go-kart will be suitable for only one rider or if you are building a two-seater. Then take chalk and make an outline of how long and how wide you want your go-kart to be.
Consider where the engine compartment will be located, and whether you will be adding roll bars into the kart chassis or any other features that might add girth or protection to the frame. When you are finished drawing the chalk outline, measure each line and write the measurements down. These measurements are the dimensions of the go-kart you want to construct.
Materials To Use In Framing
The most commonly used material for constructing a DIY go kart is tubing. You can get round tubing or square tubing. Some people want to create a stronger framework for their go-kart, and they choose to build the frame using an angle iron.
Using solely round pipes is not recommended as go-kart framing material because round pipes are heavy and the added weight will result in a slower go-kart. The majority of serious go-kart builders use a mixture of round tubing, square tubing, and angle iron to create a sturdy go-kart frame, that is also light enough to allow the vehicle to perform at higher speed but strong enough to withstand the stresses of racing and the challenges of the go-kart track.
Round tubing is frequently chosen to construct the axle support while square tubing is used for the other frame sections. The angle iron is mixed in at strategic points to add stability and strength to the go-kart frame in places where it will be under the most stress.
When building the axle, you will want to use thick wall tubing that will be light but difficult to bend or break. You can use a hacksaw or a chop saw to cut the metal pieces for your go kart to the proper length. Use a vice clamp when cutting the go-kart frame metal pieces and then use a grinder or a file to smooth the edges of the metal pieces before welding and building the go-kart.

Go Kart Clutch | Available to Buy Online
The most commonly used Go Kart Clutch is the centrifugal clutch. These items join two shafts together...
Choosing Tires
You should choose your tires according to the type of surface you will ride the go-kart on the most. Slick tires are good for street riding and kart racing while knobby tires provide better traction on dirt or uneven surfaces. Off-road buggies and ATVs use knobby tires for off-road use. Knobby tires can be used on the road but it will roll slower and tire noise will be more evident. The tires play an important part in the way your go-kart will handle.
When you build a go-kart, consider cast aluminum rims for your tires. The cast aluminum is sturdy, lightweight, and it is non-corrosive. This will give you a go-kart that is capable of moving faster, and rims that are dependable.
Steering
The steering section of your go kart is almost as important as the frame is. You need to have total control over the machine when it is running. To establish a secure steering system you should:
Take your time building your steering section because this is a major part of your go kart. Make sure that all nuts and bolts of the Steering wheel assembly are tightened securely. You don’t want it to come loose and lose control when your racing or riding off-road using your DIY dune buggy.
Create a Rear Axle
You need a rear axle to hold the rear tires and make that go-kart move freely. You will need to do the following things:
Engines
If you’re trying to build an electric go-kart or a gas-powered racing kart, you can choose to buy an engine that is already assembled for your go-kart, or create a custom engine from scratch using many different. Yes, a custom, scratch-built engine will give you more bragging rights but need many working hours to build and have the perfectly-tuned engine.
An assembled engine is plug and play. If you want to make it faster, you can buy some upgrade kits, do the necessary engine porting and fine-tuning and your good to go. Whatever your choice is, you need to have an engine the will perform and will fit your kart application requirements.
Once you get your engine you will attach it to the go-kart on a mounting plate that will be positioned on the rear center frame of the machine.
You will need to attach a clutch to the crankshaft of the engine. This is done using the set screws that come with the clutch hub. I suggest that you weld a rod to your frame in front of your brake drum. I prefer a 3/8 inch rod for this purpose. This rod will be used to anchor off the brake band. Then you will loop your chain around both of your sprockets and adjust the length of the chain so that it has about ½ inch of slack to it.

image from : costco.co.uk
Cables
You need to attach your brake and throttle cable to the corresponding foot pedals that you install. You will pull the cables to the rear of the machine and make sure they are tight. Attach the cables to the frame in a secure manner. Using wire stops you will let you attach the brake pedal cable to your brake band.
The brake cable must be cinched around the brake drum so that it will be able to stop the turning of the axle when the brakes are applied. You will then attach the throttle cable to the engine with the engine in the idle position. You need to create a kill switch for the engine when building a go-kart.
Once the engine and the cables are correctly attached. Place the go-kart on metal stands or cinder blocks. The gasoline and oil levels of the engine. Start the engine and press on the accelerator and brake pedals, check if these kart parts are functioning correctly or not. Make the necessary cable adjustments before installing the kart floorboard.
Seating
You can buy preformed seats to put in your go-kart or you can build your own custom bucket racing seat for your machine. To build a custom seat you can shape the seat out of plywood and then cover that wood with thick padding or foam and a vinyl seat cover. Cloth seat covers are not recommended because go karts frequently go through mud and the seats would easily get wet and would quickly stain and get ruined.
Extra Features
Consider adding a roll bar to the frame of your go kart. In the event that the go-kart is involved in a roll-over accident, the roll bar will help to protect the driver and passenger from being crushed by the machine. I do not consider seatbelts to be an extra when I build a go kart, but many people do. I prefer over the shoulder harnesses or a 4-point harness that will help to keep the driver properly secured in their seat in the event of an accident.
Flags can also be attached to a go-kart that is low to the ground. This increases the visibility of the machine to drivers of higher profile vehicles. Headlights can be added to the grill of the machine and fog lights can be added to the roll bar. These lights can be beneficial to people who ride early in the morning or late in the evening.
Consider a horn as another safety device for your go-kart plans. If the rider gets separated from the other people they are riding with they can always honk their horn to alert the others of their location.
Thank you to read this article about How to Make a Go Kart. Hope you like it. Please feel free to write your own stories, ideas, and experiences with us. We will appreciate it! That’s all for today, I would love to hear any comments or questions that you have about How to make a Go kart?